Grafana
Zet Grafana-alerts om in een live activiteit met tijdlijn op het toegangsscherm van je iPhone. Zie de metriekgeschiedenis in één oogopslag, met realtime updates zolang alerts actief zijn.
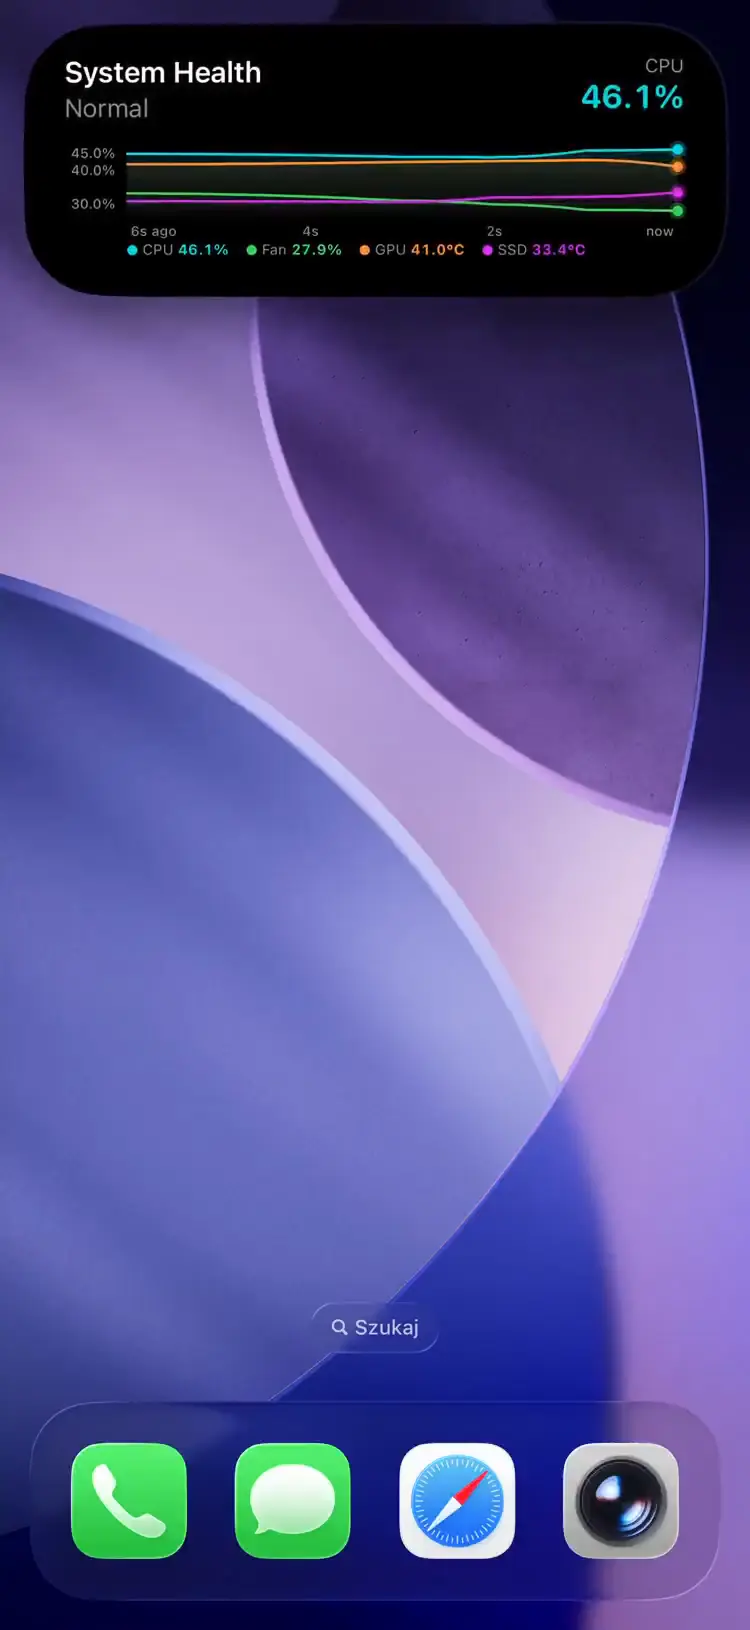
Two ways to bring Grafana into PushWard. The app plugin below is the recommended path — it runs the timeline bridge and a widget engine inside Grafana, with one-click setup. For simple alert-style notifications (firing/resolved, no history), the Relay integration needs no plugin or container at all.
Get Your Integration Key
Gebruik je standaard-integratiesleutel in de PushWard-app onder Instellingen → Integratiesleutel, of maak een sleutel met beperkte rechten voor deze integratie.
Grafana App Plugin (Recommended)
The PushWard app plugin is the in-Grafana setup and management layer. One click wires up the webhook contact point, validates your key, and renders the live timeline sparkline inside Grafana using your existing datasource — no separate container and no extra Prometheus config. It can also poll PromQL on a schedule and publish the results as iOS Home and Lock Screen widgets.
Grafana doesn't let third parties add native contact-point types — every integration (including Grafana's own OnCall) delivers through a webhook contact point. The plugin makes that setup one-click; it doesn't replace the webhook.
Requirements
- Grafana 12.3 or newer (unified alerting plus app-plugin IAM service accounts)
- A PushWard integration key (
hlk_prefix) —notificationsatsendfor test pushes, andwidgetsatwriteto publish widgets - A Prometheus or VictoriaMetrics datasource in Grafana (for the timeline history)
1. Install the Plugin
Self-hosted today: download the release ZIP from the plugin repository,
unzip it into your Grafana plugins/ directory, and allowlist the unsigned plugin:
[plugins]
allow_loading_unsigned_plugins = pushward-alerts-app
Restart Grafana, then enable the app under Administration > Plugins and data > Plugins > PushWard and open its Configuration page.
2. Connect
On the Connect page, one click creates the PushWard webhook contact point (no manual URL or header copying) along with a scoped Grafana service-account token, and validates your integration key against the PushWard API. Add that contact point to any alert rule's notification policy to start receiving timelines.
3. Configure
On the Configuration page (Admin only) you set:
- Integration key — your
hlk_key - Datasource — the Prometheus/VictoriaMetrics datasource the backend queries for metric history
- Severity mapping — which alert label drives the accent color and icon
- History window and poll interval — how far back to backfill and how often to refresh while firing
- Also send a push notification — off by default; sends a normal push alongside the quiet timeline when an alert fires and when it resolves, with a Notification priority of Silent, Normal, or Critical (Critical needs the critical-alert entitlement on your account, otherwise it falls back to time-sensitive). Plugin 0.6.0+
- Widgets — the widget definitions described below
Dit gedeelte beschrijft een functie in een app-update die door de App Store wordt beoordeeld. Zodra de update live is, wordt het hier automatisch ontgrendeld.
Repeat until acknowledged
Plugin 0.10.0 adds Repeat until acknowledged under Also send a push notification. It is off by default. With it on, the firing push gets an Acknowledge button and comes back every Repeat every seconds until someone taps it on one of their devices, or until Stop repeating after runs out. When the alert resolves, the plugin stops the repeats before the resolved push goes out, and ending the activity from the Activities page stops them too.
| Setting | Default | Range |
|---|---|---|
| Repeat until acknowledged | Off | -- |
| Repeat every | 300 seconds | 30 to 3600 seconds |
| Stop repeating after | 3600 seconds | 60 to 10800 seconds |
- A Silent push never alerts, so it cannot repeat: the switch is greyed out when the notification priority is Silent.
- Turning the switch off does not stop repeats that are already running. Those stop when someone acknowledges them or when they expire.
- An account can have at most 25 repeating notifications at once, counting everything that sends them with
your keys. When it is full, or the server refuses the acknowledge for another reason, the plugin sends the
alert once without repeats, and the delivery log shows
ack refusedwith the reason.
How the button, the repeats and their limits work is covered on the acknowledged alerts page.
End-to-end encryption
Plugin 0.10.0 can encrypt the title, subtitle and body of the alert pushes it sends, so PushWard only stores and forwards an envelope it cannot open. Your devices open it with the same key.
- In the PushWard app (1.17.0 or later), open Settings > End-to-End Encryption, create a key and copy it.
- Paste the 64-character key into End-to-end encryption key on the plugin's Configuration page and save. The page shows the Key ID in use, which should match the one the app shows next to the key.
The test notification on the Connect page is encrypted as well and reports the Key ID it used. To go back to unencrypted pushes, press Reset next to the key and save.
- PushWard can still read the notification level, the Live Activity the push links to, its collapse id and the tag of a repeating push. The link, collapse id and tag are hashes, not the alert name.
- The timeline Live Activity is not encrypted, and it carries the alert name and summary. The key keeps the alert text out of your notification history, not out of PushWard entirely.
- A key that does not work never sends the alert text readable. The push still goes out, without its text: "Grafana alert firing" (or "resolved") and "Encryption key invalid, check the PushWard plugin settings". The plugin's Configuration page shows what is wrong with the key.
- An integration key that belongs to an organization cannot send encrypted notifications. From plugin 0.10.1 the push then goes out without its text, as it does for a key that does not work.
What exactly is covered, and what a device without the key shows, is on the end-to-end encryption page.
Widget Engine
Beyond timelines, the backend can poll PromQL on a schedule and publish the results as iOS widgets.
Declare value, progress, status, gauge, and stat_list widgets in the configuration; each runs on its own interval with an on_change or always trigger mode, and a multi-series query fans out into
one widget update per series.
Management and Dashboard
The Overview, Activities, and Widgets pages show current Live Activities, a recent delivery log, and your declared widgets, and let you send a test notification or fire a test timeline. The Overview page also shows delivery counters — alerts received, activities created, pushes sent, and errors. Alert rules and instances get a View in PushWard action too.
Standalone Container (Legacy)
The standalone pushward-grafana container will soon be deprecated in favor of the app plugin above, which covers the same timeline bridge plus widgets with no separate deployment. Use it only if you can't run an app plugin on your Grafana.
How It Works
- Webhook — Grafana fires an alert and sends the webhook to pushward-grafana
- Query — The service queries Prometheus or VictoriaMetrics for the metric's recent history
- Timeline — A Live Activity starts with a sparkline chart showing the metric over time
- Poll — While the alert is firing, the service polls for new data points and pushes updates
- Resolve — When the alert resolves, the activity ends with a final snapshot
Deploy the Service
services:
  pushward-grafana:
    image: ghcr.io/mac-lucky/pushward-grafana:latest
    ports:
      - "8090:8090"
    environment:
      PUSHWARD_URL: https://api.pushward.app
      PUSHWARD_API_KEY: hlk_YOUR_INTEGRATION_KEY
      PUSHWARD_METRICS_URL: http://prometheus:9090
      # Optional: webhook secret (must match Grafana contact point)
      # PUSHWARD_WEBHOOK_TOKEN: your-shared-secret
      # Optional: Grafana API for auto-extracting PromQL from alert rules
      # PUSHWARD_GRAFANA_URL: http://grafana:3000
      # PUSHWARD_GRAFANA_API_TOKEN: glsa_...
    restart: unless-stopped
Configure the Grafana Contact Point
- Navigate to Alerts & IRM > Alerting > Notification configuration > Contact points
- Click + New contact point
- Select Webhook as the integration type
- Set URL to your pushward-grafana instance (e.g.
http://pushward-grafana:8090/webhook) - If you set
PUSHWARD_WEBHOOK_TOKEN, expand Optional settings and set Authorization header scheme toBearerwith the matching token - Click Test, then Save
Create a Notification policy that routes alerts to this contact point.
Configuration
| Omgevingsvariabele | Beschrijving | Standaard |
|---|---|---|
PUSHWARD_URL | PushWard server URL | -- |
PUSHWARD_API_KEY | Integration key (hlk_ prefix) | -- |
PUSHWARD_METRICS_URL | Prometheus or VictoriaMetrics URL | -- |
PUSHWARD_WEBHOOK_TOKEN | Shared secret for webhook authentication | (none) |
PUSHWARD_SERVER_ADDRESS | HTTP listen address | :8090 |
PUSHWARD_PRIORITY | Activity priority (0-10) | 5 |
PUSHWARD_CLEANUP_DELAY | Delay before cleanup after resolved | 15m |
PUSHWARD_STALE_TIMEOUT | Ends activity if no updates received | 24h |
PUSHWARD_GRAFANA_URL | Grafana API URL for auto-extracting PromQL | (none) |
PUSHWARD_GRAFANA_API_TOKEN | Grafana service account token (Editor role) | (none) |
PUSHWARD_HISTORY_WINDOW | How far back to query on alert fire | 30m |
PUSHWARD_POLL_INTERVAL | How often to poll for fresh data points | 30s |
The sparkline visual settings have no environment-variable override — set them under the timeline: block in the config file: timeline.smoothing (curve smoothing,
default true), timeline.scale (linear or logarithmic, default linear), and timeline.decimals (value
precision, default 1).
Dashboard Links
The bridge forwards the alert's silenceURL, generatorURL, and panel
links straight through to the notification — both http:// and https:// schemes are accepted, so a self-hosted Grafana on a LAN (e.g. http://grafana.internal/d/abc) round-trips cleanly for users on VPN. URLs without an http(s):// scheme are dropped on the way in.
PromQL Resolution
The timeline needs a PromQL expression to query metric history. The app plugin reads the firing rule's query from your datasource automatically; the standalone container resolves the query in this order:
- Auto-extract (recommended) — If
PUSHWARD_GRAFANA_URLandPUSHWARD_GRAFANA_API_TOKENare set, the service reads the alert rule's PromQL expression via the Grafana API. No per-rule configuration needed. - Annotations — Add annotations to your Grafana alert rules to specify the query explicitly.
- Webhook values — Falls back to the numeric values included in the Grafana webhook payload (no history, just the current value).
Per-Rule Annotations
Add these annotations to your Grafana alert rules to override the query or tune the sparkline:
| Annotation | Description | Example |
|---|---|---|
pushward_query | PromQL expression for history backfill | avg(rate(http_requests_total[5m])) |
pushward_unit | Unit label shown on the sparkline | %, °C, ms |
pushward_threshold | Threshold value shown as dashed line | 80 |
pushward_ref_id | Which values key to use (default: first) | B |
Severity Colors
The sparkline accent color and icon are derived from the severity label on the alert rule:
| Severity Label | Color | Icon |
|---|---|---|
critical | Red | Alert octagon |
warning | Orange | Alert |
info | Blue | Information |
Add a severity label to your alert rules (e.g. severity = critical) for automatic color and icon theming.